Lady McDonald - Canmore, Alberta
Other Equipment
Follow Eric and Jarek on Instagram for many of their other epic searches. These guys rock. IG ids: @barberic06, @scary_uncle_jerry
This aint no lady!
This is one of the most rewarding hikes in terms of great views. The switch backs don't really ease up until a rocky section, where you have to do some minor scrambling. After that the trail will begin to flatten out a bit and will narrow.
Technical Details
- Elevation at peak: 2223 meters, 7,296 feet
- Total hiking time (for someone in good shape): 6 hours
- Degree of difficulty: high
The Hike:
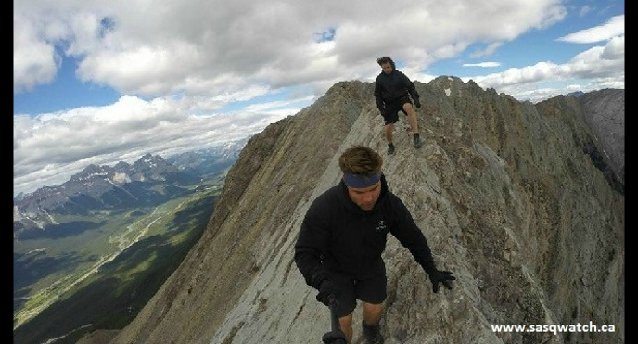
The following video was taken at the very last part of our climb to the summit of Lady McDonald itself. At approximately the 2 minute mark is the best and most narrow part of the ridge! A little hairy/scary to say the least. We probably should have had ropes.
The spiritual experience that one gains when reaching the summit of this mountain is probably beyond words. Although these pictures look good, they do not give this wild country all the justice it deserves. We were absolutely in awe of the Canadian Rockies at the top of Lady McDonald. However, in order to receive her gift of spiritual uplifting, you must pay a price.
But, if you're willing to put in the effort, it's well worth it. Along the way you will get a great views of Canmore, incredible mountain terrain, and very likely multiple sightings of mountain goats and other wildlife.

This is definitely a case of "no pain, no gain". This climb requires a better than average level of conditioning. It is a very steep and rigorous climb. I would describe this climb in three stages.
Stages:
Stage 1: The first stage is the climb up to the helipad. Not too bad. When you reach the helipad, this can be an excellent place to rest up a little and take in an amazing view of the Rockies from the helipad.
Stage 2: From the helipad, you will begin the steepest and most grueling part of the hike. One of the reasons that this part of the hike is also very hard to negotiate is because of the scree (i.e. very loose, rocky terrain). This part of the hike, in my opinion, is not for an average hiker. On this part of the climb you will eventually reach the mountain's ridge.
Stage 3: At this stage you've reached the ridge. If you have extra or baggage I would highly recommend that you drop it off at this point. There's a noticable drop off/rest area. Most hikers would leave some of their gear here as it would very difficult to carry from this point on. You would then traverse the ridge up to the summit. Although the ridge hiking is not as grueling as the climbing in stage 2, it is very challenging. This becomes very clear when you watch the video that Scary Uncle Jerry produced for us here. There's a reason we call him that. It was quite a challenge to hold that camera and walk that ridge at the same time. We probably should have used some ropes on the ridge.
But, since she's so difficult to climb, that makes her a lady after all.
Missed Sunset but...
We've been on this hike a few times. One Friday night after work we zipped out of town (gear packed night before) and practically ran up the mountain to catch a sunset.
Unfortunately, we got up to the helipad too late to see the sunset. So we ended up roughing it by camping out on the helipad over night with our NEO Air Thermarest blow up mattresses and Marmot Cloud Break thermal sleeping bags and dozed off under the stars..
Althoug we missed the sunset, we were rewarded with a glorious sunrise the next morning as you can see in the photos (below).


The boots I used all summer were Solomon Goretex xa3d Ultra. Quick tie boots that are waterproof and proved incredibly resilient for the abuse I gave them. The backpack was an Osprey Talon (33 gallon). My poles were garbage. All my other stuff I'm really happy with though
All the photos and video where take with a GoPro camera (by Crazy Uncle Jerry).
Location Description
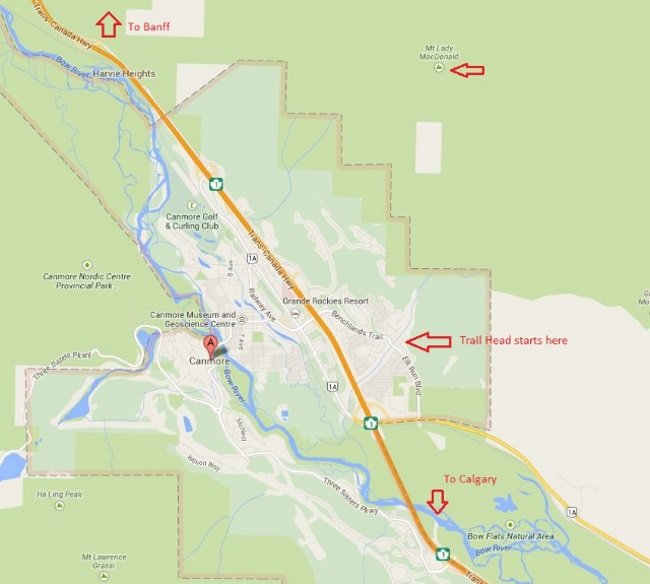
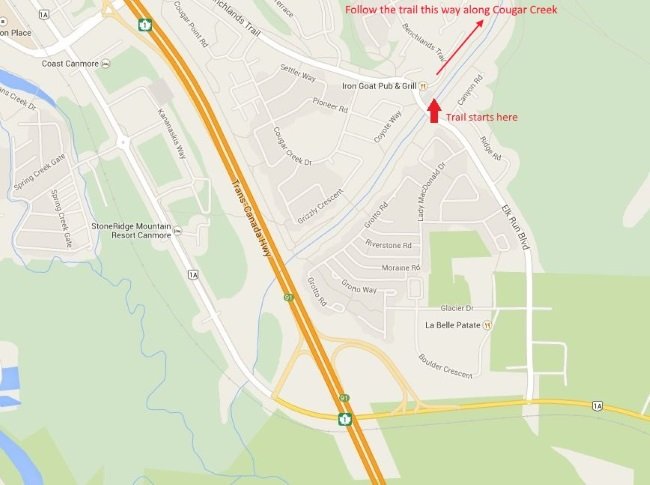
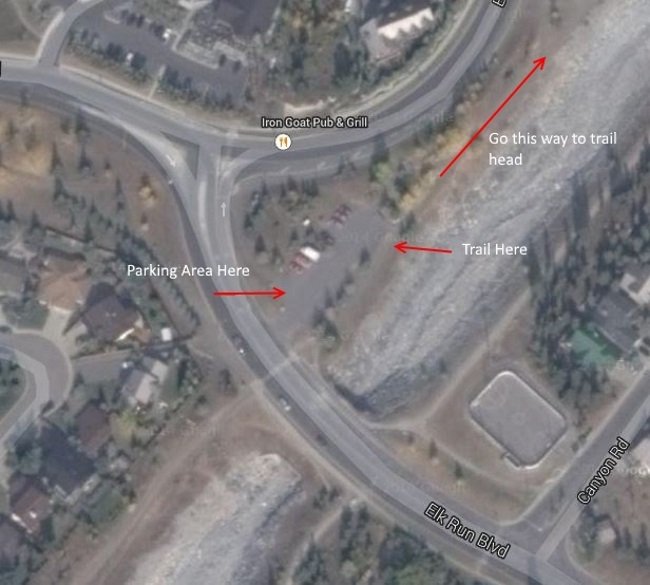
To get to the trail head take exit 91 off off highway 1 (exit for highway 1A Bow Valley trail). Turn east on to Hwy 1A and follow this until you get to Elk Run Blvd. At Elk Run Blvd. turn left (north) and follow this until you cross over Cougar Creek. Almost immediately after you cross over the creek there should be a gavel parking lot on the right. Park there. The trail follows along the creek ( as per the map below)
From parking lot you will see where the creek has been washed out from the flood that took place in the summer of 2013. Stay on the west side of the creek and begin you're trek along the creek. Keep you're eyes peeled for the trail peak, there will be signs at the start and another sign or two on the ascent to let you know you're on track. Continue on the switch backs and keep your mind on the grind.